Setting up a hosting account
To create a hosting account for the website, I used Plesk, which is a hosting control panel. I will need to create a customer account to set up my domain and create a platform for my website. It will also allow me to complete tasks such as setting up FTP access and applying SSLs. I created a new customer account by pressing “Add a customer”.

The first set of details is for accessing the customer account in Plesk. The second set of details is for the domain subscription. This sets up a set of properties for the website.
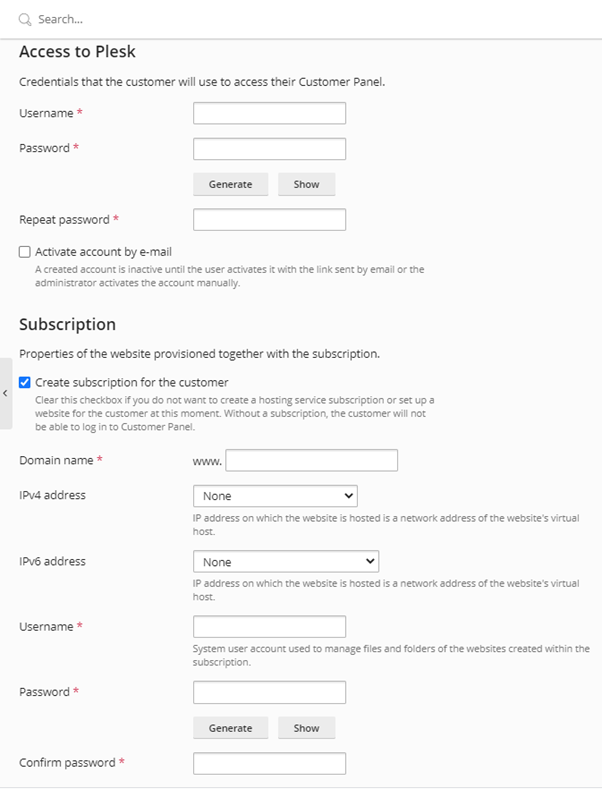
Domain name: - This is where I will input the domain name I will be using for the website: leannejade.co.uk. When loading a website, the user's computer will access the server via the IP, not the domain name. As IPs can be difficult to remember, the DNS (Domain Name System) translates the IP into a domain name. An example of this is Google. To access google.com, you can type google.com in the address bar. Alternatively, you could type in 142.250.186.142 or 142.250.186.164.
IPv4/IPv6 address: - This is where I allocated an IP address to the domain. I have a choice between a shared or a dedicated IP. A shared IP is where multiple websites and domains are hosted on the same IP, whereas a dedicated IP is where one website or a singular domain with multiple websites is hosted on an IP of its own.
The username and password are for FTP access. FTP (File Transfer Protocol) is the protocol which deals with file transfer. This can be between two LANs (local area networks) such as computers on the same network, or between a LAN and a WAN (wide area network) such as a computer and a server. This will allow me to transfer the website files from my computer to the web server.
The service plan outlines what resources from the server the website can use. This allows for a range of resources including the amount of disk space the website can use the number of mailboxes that can be allocated to the domain and the number of domains, subdomains and aliases that can be allocated. Service plans ensure that each website gets the sufficient resources that it requires.
I have now created my customer account.
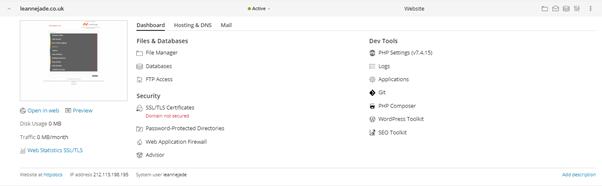

When I first started at Cloud Heroes, one of the first tasks I learned how to do was to create hosting accounts for customers. Hosting accounts consist of space for website hosting, DNS, and email storage. Setting up hosting accounts is very common when it comes to setting up new customers for one of our resellers, Expert Agent. They are a company that provides a platform for estate agents to run their business on.
When we first receive the request, we add it to our job system. We then go to the web interface of our web server and create a new hosting account. We first have to set up the user account, adding the details of the new customer Expert Agent has provided us with. We continue with adding the web hosting element to the user account by adding the domain to the hosting account so that the web space is designated to the domain. Once we have added the domain, we can assign a subscription to it. A subscription tells the server how much space a domain can use on the server and can automatically block usage if over the limit or is taking advantage of the Fair Use Policy.
No DNS or email set-up is required on these, as Expert Agent complete these themselves. We do have to provide login details and FTP details so that Expert Agent can transfer websites to the new hosting account. Passwords are added securely to our customer portal, where they are viewable for 30 days before they are erased from the server. Once Expert Agent have completed this, we install an SSL to ensure the site stays secure.
In the Occupational Brief, this covers:
Remote Infrastructure: In most cases, we only require a desktop to complete the set-up. Sometimes we need to point a domain to a new hosting account, we may need to access Nominet or Total Reg, which is where we manage domain names. Total Reg is a single sign-on website, however, Nominet requires MFA (multi-factor authentication). We require an iPad to generate a code via Google Authenticator, which is entered into the website.
Security: Cloud Heroes have a secure process of sending passwords, which erases them after 30 days. This process meets ISO standards. This is to protect Expert Agent and their end users. We also install an SSL, which adds a layer of security to their websites. This is part of the hosting account setup process, shown above.
Problem-solving: We must be compliant with Cloud Heroes guidelines to complete tasks, as the Cloud Heroes guidelines are in accordance with ISO standards.
Workflow Management: We receive these requests daily, so they are allocated to either myself or my colleagues, depending on the work each of us is working on. Setting up a hosting account only requires one person.
Performance: In this situation, we are setting up a hosting account, which will be held on a shared system. This will be using a GUI, or a piece of software installed onto a server to make it easier for the user to navigate around.
DNS Propagation
My next task is to make sure the domain is on the correct name server. Doing this ensures that I will be able to load the website files, hosted on Plesk, from the domain. This will then allow me to load the website files with the domain. At this moment in time, my domain leannejade.co.uk is currently pointing at my domain registrar, Namecheap’s name servers.
To change this, I will need to open both the DNS settings on Plesk and the DNS settings on Namecheap.
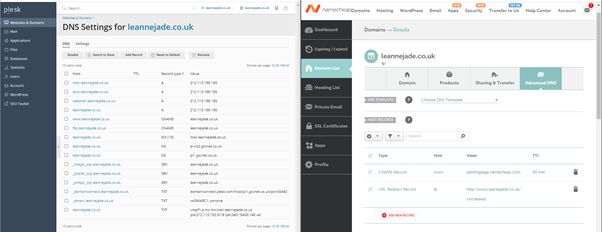 The name server is listed as an NS record in the DNS settings. This is the only record I need to copy onto the DNS settings on the domain registrar.

The name server is listed as an NS record in the DNS settings. The host will be an @ as the @ symbol represents the current domain name. Alternatively, I could add the domain name as the host (leannejade.co.uk).
The value is set to the name of the name server. The name server will also have a full stop at the end. If a full stop is not added to the end of the value, the record will automatically add the domain name afterwards (for example pl-ns2.jpcinet.co.uk.leannejade.co.uk). As it would no longer be pointing to the correct name servers, there would be an error when trying to load the website.
TTL (Time To Live) is how much time a data packet will “live” within the network before it is made redundant. This can be between 600 seconds (10 minutes) and 86400 seconds (24 hours). Automatic TTL will set the data packet lifespan to the default set by the domain registrar. Namecheap’s default is 1800 seconds (30 minutes).
Now that I have set up the account and changed the name servers, I will need to wait for the DNS to propagate. In the meantime, I will start designing and building the website.
We received an email recently from Wiltshire Police for a DNS change. Once we entered the email contents into our ticketing system, we need to make sure that the request is coming from the account holder or another person that the account holder has authorised. If the request did not come from either of the above, we need confirmation from them to make the changes for security purposes. The request came from the account holder, so we can complete the changes.
Wiltshire Police have a different system than outlined above, which is more secure compared to Plesk. Access is only allowed for Cloud Heroes, so we are required to make the changes on their behalf. The change is very similar to Plesk, however, this system has 3 name servers whereas Plesk has 2. This can make it longer for all 3 to sync the changes. We can check if the changes have been completed via a tool called MXToolbox. This website allows you to check if certain records have synced correctly, and is used constantly here at Cloud Heroes. Once we are happy that the records can be seen and synced, we can go back to the customer and confirm the changes have been completed.
When contacting customers outside of the ticketing system, we need to update the ticket manually. We reply to the email and copy the contents into the ticket we opened earlier. We also copy the ticket number and add this to the end of the subject. This will allow us to have good record-keeping, in case we need to retrieve the ticket in the future.
In the Occupational Brief, this covers:
Communication: Although we do not hear from them often, they usually send important details via e-mail, so that we don’t make incorrect changes. We usually receive a phone call to check for updates, or if there are any issues with the changes.
Security: Their DNS is held on a more secure server, as they are a .gov.uk domain holder. This process is different, as it requires access to a different DNS server compared to other customers. Because they’re on a secure server, access is limited to Cloud Heroes, so they are unable to self-serve. We require a main contact for the organisation, so changes can be requested by them for security. This protects the organisation from any DNS changes made by a person that they have not approved.
Data: When checking and analysing DNS records, I use a mix of tools. MXToolbox shows the DNS that is currently active, and will help flag any issues with the record. A tool called Security Trails allows you to check past DNS records, which is useful to find out of any unauthorised changes have been made or to retrieve a dropped DNS record. We use both of these daily, as we complete DNS changes fairly often.
Workflow Management: Although we do not receive these requests frequently, all DNS requests require tickets and need allocation. DNS changes only require one person but may require another for a second opinion if there are any issues. This would mean working with a colleague to find a solution to an issue.
Performance: In this situation, we are making DNS changes, which will be held on a shared system. This will be using a GUI, or a piece of software installed onto a server to make it easier for the user to navigate around.
Website design and layout
As the website will be a portfolio, I will be creating a site that is simple and easy to navigate. I will be using HTML, PHP and CSS. It will include a basic colour palette so that the website looks professional and slick. The colours on the website will be in hex so that it can work with HTML, PHP and CSS. Hex colour codes start with #.
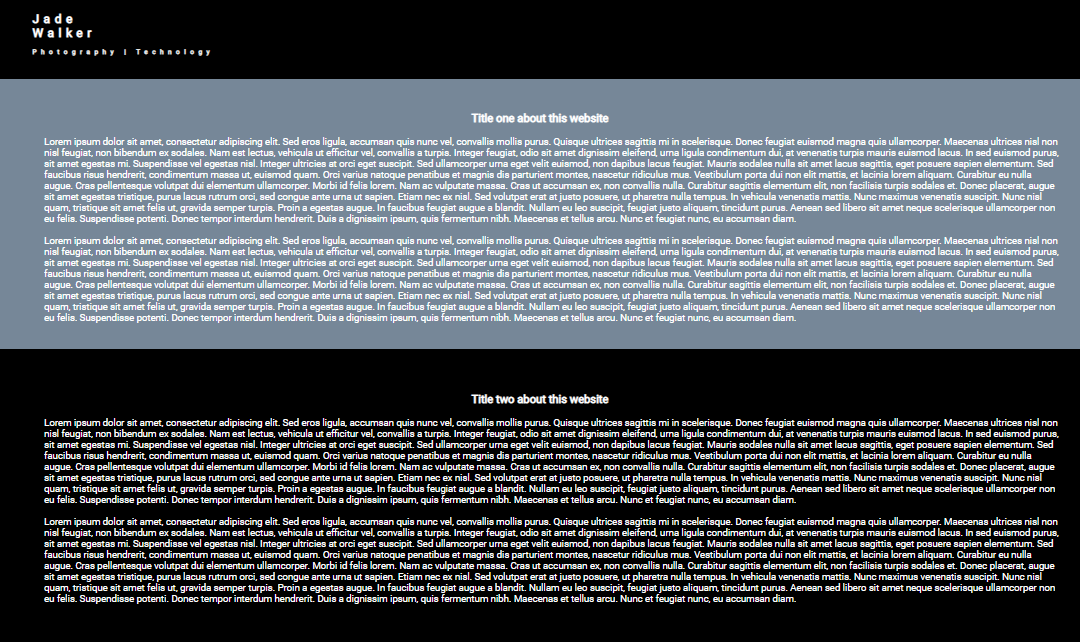
 On the landing page, I will have a large header, in faded light grey (#758799), with my name as the header. I would like the header text to be in Roboto, which is a Google Font.
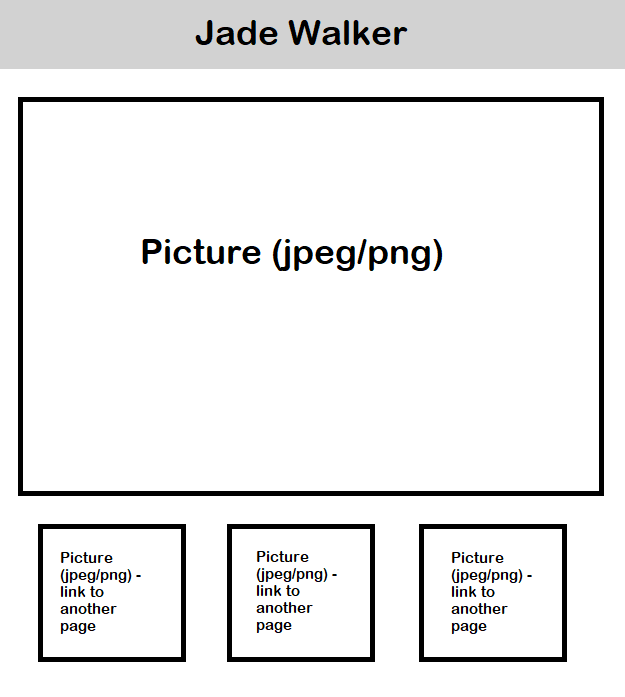
I could add a navigation bar at the top of the webpage so that the user can access the different pages, however, I feel that it would make the webpage more complicated and would move away from the slick design. Instead, I chose to have the URLs to different web pages underneath the picture.
I am debating whether I should have one set picture in the middle of the webpage, or if I should have a slideshow, where multiple pictures are viewed in a set order. If I were to go with this option, I could either choose a manual slide show, where the user would have to press buttons to be able to see each picture, or automatic, where the pictures are viewed on a timer.
The pictures underneath the large picture element will be used as URLs, to navigate to the different portfolios I have. The pictures will be of the portfolio or associated with the portfolio link. The URL to the portfolio is the picture, so no matter where the user clicks on the picture, the URL will load that webpage.
 When the URL is clicked on, it will send the user to the portfolio that the picture represents.
An example portfolio webpage is a simple design with the same title style, however with different text. Each page will have the title of the portfolio so that the user knows which page they have gone to.
When the URL is clicked on, it will send the user to the portfolio that the picture represents.
An example portfolio webpage is a simple design with the same title style, however with different text. Each page will have the title of the portfolio so that the user knows which page they have gone to.
As the page is for portfolio work, I will have a mixture of text and pictures. The text font will be Roboto to match the title. The text will be aligned to the left of the page however the headers will be centred.
The page will be a scroll page, and I may add a contents list at the top of the page, so that the user can find the part of the page they need quickly.
I may add extra parts to the website as I go along, as I may find a better way to build or show something, however most of the elements I have shown I will be using.
Web development: GitHub
I decided to use GitHub to track changes I made to the website. GitHub is a place where developers can use open-source code, making and tracking changes to both already created code or new code. GitHub will allow me back track at any time if changes I made were not correct. It will also help me understand other tools that I will need to use alongside GitHub. Plesk can integrate with GitHub so that any changes I make on the website will be shown on GitHub and the website. When coding, I use Visual Studios, which has GitHub built in. Once I have edited the code, I can commit changes, which means the changes have been logged. Once the changes have been logged, I can push any changes to Plesk, which then makes these changes live.
Web development: Getting Started
The first step is to create the files and folders where the website will be built in. I created a main folder called “leannejade.co.uk” and created a file called “index.html”. This is where the landing page will be. If the file had a different name to “index.html”, it would not be recognised by the server as the main page, and there would be an error. I also created a file called CSS, which I will be using later. I opened the HTML file in Notepad ++ and started building the first page of the website.

To start the webpage, I need to set the doctype declaration. When the page is open, this line of code tells the browser what language the code is written in. This then allows the browser to translate the code into readable text. All HTML webpages need the doctype declaration.
The second line of code defines the language or country combination that the text is written in.
<!doctype html>
<html lang="en-gb">
The next part of the code is the head tag. This tag holds all the metadata or information of the contents of the webpage.
<head>
<title>
Jade Walker</title>
<meta
charset="utf-8">
<meta>
name="viewport"
content="width=device-width, initial-scale=1">
<link>
rel="stylesheet"
href="css/custom.css">
<head>
The first line of the head tag is the page title. This is the text shown on the tab bar at the top of the browser. This identifies what the site is, so if the user changes tabs, they can get to the right one quickly. I chose to create a < div > tag so that I could use the class attribute to give the header and the header text different styles. The h1 tag will hold the header text.
<div
class="header">
<h1>
Jade Walker</h1>
</div>
How it is time to see how the website looks.
The page title shows on the tab bar. This is exactly what I wanted. Other than adding a logo next to my name, no further action is needed on that element of the site. However, when looking at the webpage, I can see that the text sits to the left of the page and is quite small. As well as the header not being correct, I am also missing the band of colour at the top. This is because I have yet to create a CSS file and style them both.
 In my CSS folder I made previously, I have created a custom.css file. This is the file I had linked back in the <head> tag. CCS means “Cascading Style Sheet” and means that any styles in the file are used across the site. For example, if I have a paragraph (<p>) with a font of 12px in the style sheet, every piece of text inside a <p> tag across the site will have a 12px font.
Firstly, I wanted the h1 tag, which holds my text, to be centred. ‘text-align’ is a CSS style which moves any text with the style applied to any position on the page. ‘text-align: center’ means that the text will be in the centre of the page.
h1
{
text-align
: center;
}
Now, lets go back to view the page to see what happens.
Although I can see that the text is in the middle of the page, it is quite difficult to read. The default is 2em, but I would like it to be 4em. Em is a unit of text size. To change the text size, I need to go into the h1 tag again in the style sheet and add another attribute. ‘font-size’ is the size of the font and will recognise many different units of length including px, em and percentages.
h1
{
text-align
: center;
font-size
: 4em;
}
Now that I had gotten the basics out of the way, I decided to go ahead and start making the website look more appealing.
AgencyUK is a company that provides websites using our infrastructure for Hosting Accounts, with SEO and marketing for companies across the UK.
A recent order from AgencyUK from us had been a hosting account for a well-known charity. A few days after sending over the details to access their new hosting account and setting them up with a new WordPress website to edit, we received a phone call from their account management team in regards to a potentially malware-stricken website. After analyzing the website, the website files, and any logs that were created by the website, I was able to discover that extra files had been uploaded from an alternate source.
The most common vulnerability in WordPress that could be used to upload files is the XML-RCP vulnerability. XML-RPC is a file, included in the base install of WordPress, which allows remote connections to the WordPress website. This allows tools and applications to access the website, such as RSS Feeds. Because this allows remote connections without any authentication, this file can be exploited and used to upload malicious content to the website.
After we found this, we completed a restoration of the website. Although the website is a few days old, our infrastructure completes a backup in order to catch any changes. We contacted AgencyUK via email and a follow-up phone call with some advice. In this case, we advise that XML-RPC is disabled on this website and any future website they create. If the file is needed, it can be enabled again. We also advised that they install a WordPress plug-in called WordFence, a security plug-in that detects malicious activity, blocks intrusions, and ensures your WordPress website is secure.
In the Occupational Brief, this covers:
Communication: This exchange had originally been over the phone, however, any summaries or updates were also sent via email, to ensure AgencyUK had the correct details to inform their customers. Sometimes we are required to talk to their customers as a third party, however, in this case, we were not required to contact their customers.
Security: Unfortunately, WordPress isn't the most secure, however, it is one of the best free website builders for inexperienced website designers. We are aware that there is a demand for WordPress-friendly hosting, so we need to have safety features installed alongside our infrastructure. We have a firewall between servers that hold customers' websites and the outside world, to be the first defence in case of an attack. In the event that an attack reaches the website itself, we have an antivirus installed on our web servers to scan website files for malicious code constantly.
Problem-solving: We must comply with Cloud Heroes guidelines to complete tasks, as the Cloud Heroes guidelines are in accordance with ISO standards. We use a 3rd party tool to scan for and resolve malware intrusions, along with a backup/restore service as an alternative.
Workflow Management: These types of issues are rare, however, these issues are documented thoroughly in tickets. In case the issue becomes more problematic and requires escalating, the ticket needs to include every step both I and the customer completed, with the results of those steps. Escalation would be immediate if any results show that the malware is more widespread, and could affect other websites on the same server.
Performance: In this situation, we are investigating and resolving website issues, so we will need to access websites held on a shared system. This will be using a GUI, or a piece of software installed onto a server to make it easier for users to navigate around. Some pieces of software we use are via command line (CLI), are not accessible by users, and can only be accessed by users in the local network. This means me and my co-workers can complete tasks that customers cannot.
Web development: The Header
I wanted to make the header look fancy, but not too complicated. With the plan I had, I decided I wanted the header text to be to one side, with some text underneath it. Having a <br> tag between my first and last name separates the two on different lines and makes it look more professional. I then added text underneath my name. I had to create an ID called "undertext" to change the font size. The ID gives a specific item a different style from the rest of the same items in the same tag. This means no other text in the <h1> tag will be affected.
HTML
<div
class="header">
<h1>
Jade
<br>
Walker</h1>
<h1>
id="undertext">
Photography | Technology</h1>
</div>
In the CSS file and the h1 tag, I had to make sure everything had been in line, which is why I have various styles like "padding-top" which makes sure that there is enough padding above the text and the top of the page. I wanted the text to have spacing between the letters, so I used "letter-spacing" and set it to 9px. I also set the text colour to #ffffff, which is the hex code for the colour white.
In the .header attribute, I have a few styles that should make sure that the header spans the whole page. "width: 100%" is the style that is responsible for this. "position: fixed" is the style that should keep the header at the top of the page and visible even when scrolling. I have decided to have the background set to #000000, which is hex for the colour black. This will mean that the text in the h1 tag will be easy to read.
The undertext ID is in the h1 tag. This means any attributes, such as text size, that are in the h1 tag should be the same for anything with the ID tag unless specifically mentioned. I am needing the text size for the text in the undertext ID to be smaller than the text in the h1 tag, however, I want everything else, such as text colour, to stay the same.
CSS
h1
{
font-size
: 4em;
color
: #ffffff;
letter-spacing
: 9px;
height
: 1em;
text-align
: left;
margin-left
: 50px;
padding-top
: -50px;
padding-bottom
: 20px;
}
.header
{
padding
: 15px;
background
: #000000;
top
: 0;
margin
: -0.5em;
width
: 100%;
position
: fixed;
}
#undertext
{
font-size
: 0.8em;
}
Now the page should have a fixed header with my name and and text underneath it.

Web development: The Big Picture
To create a big picture at the top of the site, I need to include an img tag, along with some attributes.
HTML
<img
class="main" src=img/main.jpg alt="main">
The img tag holds a class, which will allow me to style the image and style any other images within the class. src allows me to link the image that I would like to be viewed on the website. The alt identifies the picture when accessibility tools are used on the website, such as screen readers. With the CSS file, I will be creating styles for the img tag and the .main class. For the image tag, I will need to make sure that it spans most of the page, with a small gap between the edge of the image and the edge of the site. This is what margin-top and margin-bottom are.
The .main class makes sure that the specific picture fits with the rest of the page.
CSS
img
{
max-width
: 200%;
max-height
: 200%;
display
: block;
margin
: 0 auto;
margin-bottom
: 2em;
margin-top
: 2em;
}
.main
{
max-width
: 90%;
max-height
: 30%;
display
: block;
margin
: 0 auto;
padding
: 5em;
margin-bottom
: 2em;
margin-top
: 10em;
}
This should now have a photo at the top of the page. The image I used for this was my own so I did not have any issues with copywrite.

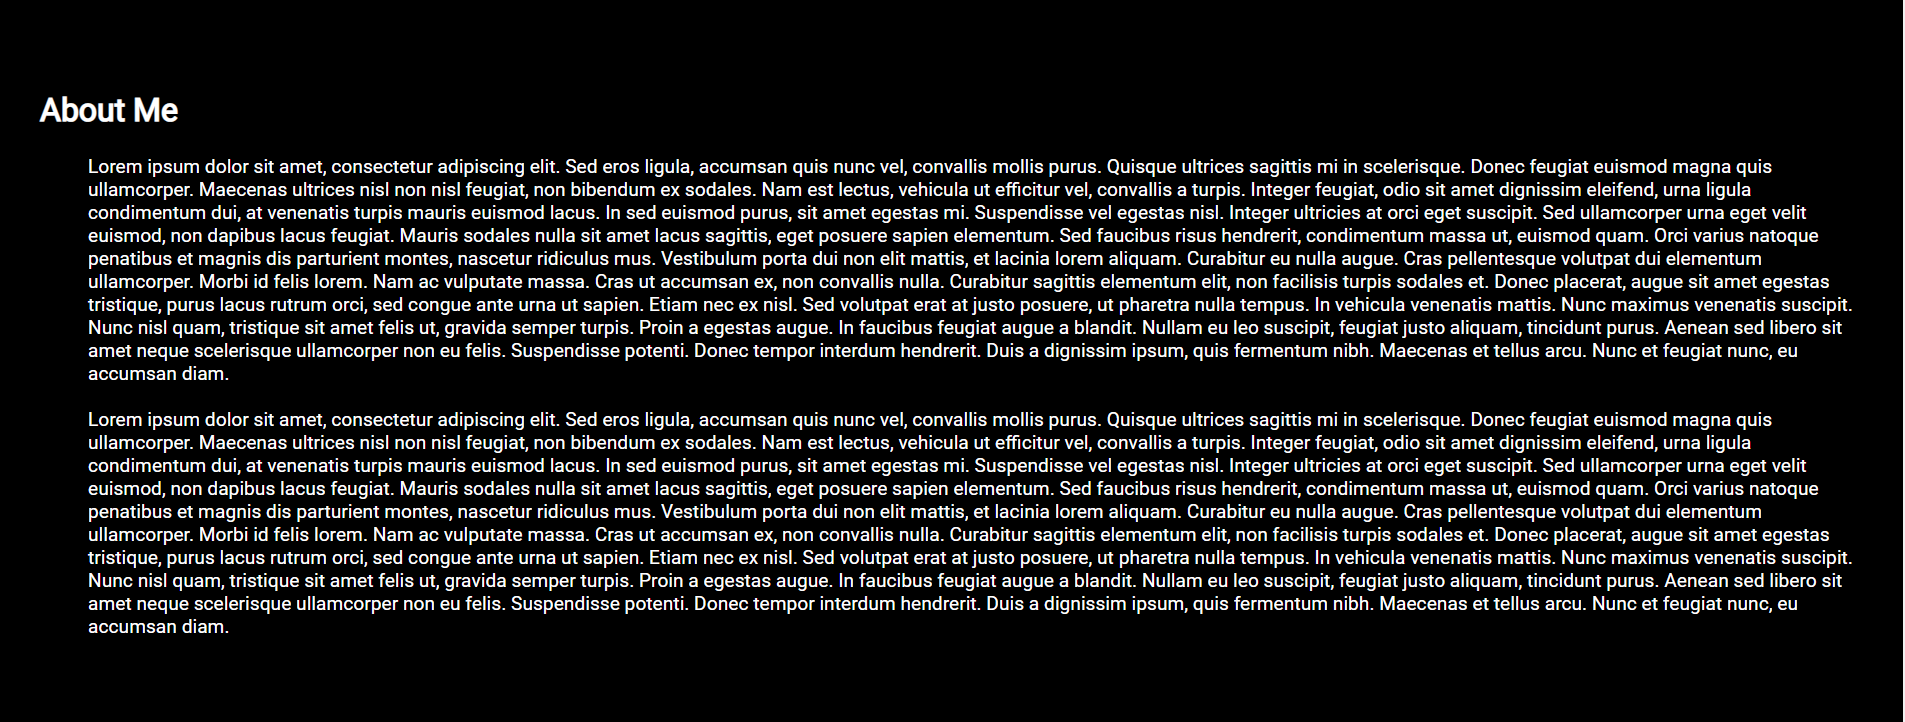
Web development: About Me
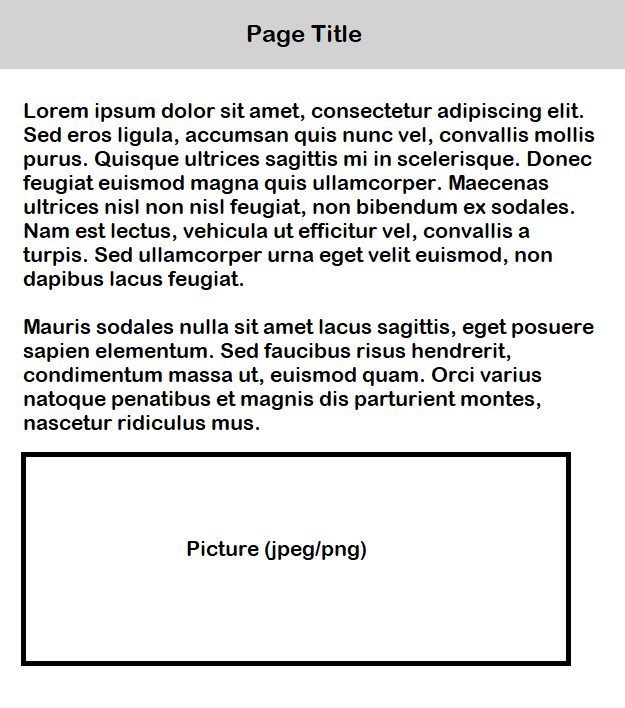
The next steps are to create an "About me" box, which should explain how I came to understand everything I learned. I will only need a small piece of text, <p> with the header, <h2> above it. This will contain a large paragraph about myself, similar to a cover letter, describing work I've completed and skills I would like to showcase. The whole of the "About Me" box will be held by the <div> tag. It will also have a class, which means I can style the <div> box.
The <h2> tag will hold the title, and will be styled differently than the rest of the text on the page.
The <p> tag, holds the main text.
HTML
<div
class="black"
<h2> About Me </h2>
<p> Lorem ipsum dolor sit amet, consectetur adipiscing elit. Sed eros ligula, accumsan quis nunc vel, convallis mollis purus. Quisque ultrices sagittis mi in scelerisque. Donec feugiat euismod magna quis ullamcorper. Maecenas ultrices nisl non nisl feugiat, non bibendum ex sodales. Nam est lectus, vehicula ut efficitur vel, convallis a turpis. Integer feugiat, odio sit amet dignissim eleifend, urna ligula condimentum dui, at venenatis turpis mauris euismod lacus. In sed euismod purus, sit amet egestas mi. Suspendisse vel egestas nisl. Integer ultricies at orci eget suscipit. Sed ullamcorper urna eget velit euismod, non dapibus lacus feugiat. Mauris sodales nulla sit amet lacus sagittis, eget posuere sapien elementum. Sed faucibus risus hendrerit, condimentum massa ut, euismod quam. Orci varius natoque penatibus et magnis dis parturient montes, nascetur ridiculus mus. Vestibulum porta dui non elit mattis, et lacinia lorem aliquam. Curabitur eu nulla augue. Cras pellentesque volutpat dui elementum ullamcorper. Morbi id felis lorem. Nam ac vulputate massa. Cras ut accumsan ex, non convallis nulla. Curabitur sagittis elementum elit, non facilisis turpis sodales et. Donec placerat, augue sit amet egestas tristique, purus lacus rutrum orci, sed congue ante urna ut sapien. Etiam nec ex nisl. Sed volutpat erat at justo posuere, ut pharetra nulla tempus. In vehicula venenatis mattis. Nunc maximus venenatis suscipit. Nunc nisl quam, tristique sit amet felis ut, gravida semper turpis. Proin a egestas augue. In faucibus feugiat augue a blandit. Nullam eu leo suscipit, feugiat justo aliquam, tincidunt purus. Aenean sed libero sit amet neque scelerisque ullamcorper non eu felis. Suspendisse potenti. Donec tempor interdum hendrerit. Duis a dignissim ipsum, quis fermentum nibh. Maecenas et tellus arcu. Nunc et feugiat nunc, eu accumsan diam.</p>
</div>
The CSS will be black so that it could compare with the background colour behind the picture above. I also made sure that the colour of the text had been set to white #ffffff. By adding the text colour into class, the text on top of every black segment will be white, and I won't need to add it to the h tags or p tags. To get the text to the centre, I had to add padding and margin to the CSS.
CSS
.black
{
font-family
: Roboto;
font-size
: 2em;
colour
: #ffffff;
background
: #000000;
padding
: 2em;
padding-top
: -15em;
margin
: -1em;
}
Now I should have a section of the website with an "About Me" section.
At Cloud Heroes, we back all systems up to a remote server in the event of a disaster recovery event. We use a service called Acronis, which uses a mixture of data retention and cyber security to keep systems safe and secure. We were in the process of migrating from another backup software which did not fit the needs of the company or the customers we have, and I was requested by the CTO to complete research about Acronis to see if it is a better fit. My research is linked here.
The company decided that switching to Acronis would benefit the company, and I was tasked to move all servers and VPS' we ran both internally and for customers over to the new service. Unfortunately, midway through the move with one of our customers' VPS', I encountered some issues. I communicated with the CTO, who provided me with the information he had regarding the error I had received, and advised me to contact the supplier. I decided to set up a meeting with our Account Manager over at Acronis to see if they had any information to provide. Our Account Manager described the error to me, and what may have caused it. He also assisted me in the resolution via a remote connection and verbalized the process that he went through to stop the error and allow the VPS to complete a full backup. With the information both the CTO and the Account Manager provided, I have been able to fix this particular error that has come up many times while I have been at Cloud Heroes.
In the Occupational Brief, this covers:
Communication: We do not hear from Acronis regarding their software. We are usually the ones to start a support ticket or an email ticket with them.
Security: The CTO has a main account to manage all servers and VPS' backups. The support team have access to most servers and VPS' except any company that has a support contract or out-of-hours support, which the CTO completes. This process meets the company's standards and Cyber Essentials, as there is restricted access depending on company roles. This is to protect our end customers and their data.
Problem-solving: We must be compliant with Cloud Heroes guidelines to complete tasks, as the Cloud Heroes guidelines are in accordance with ISO standards. Any issues will be passed confidentially over to the necessary parties internally via email or an internal ticket unless resources are exhausted and we require assistance from the supplier.
Remote Infrastructure: The support team has access to most VPS in Acronis via a desktop, through an account with limited access, however, some VPS require login to the admin account, which our CTO only has access to. If there is a VPS we need to manage that is attached to the CTO's account, we will need to contact the CTO via a phone call to send over the query to him. I will also need authorisation from him to contact Acronis Support, which would also be completed over the phone.
Performance: Depending on the server, it can either be shared or dedicated. Servers that hold VPS' may have many running at one time. Acronis can be accessed by a GUI, however some servers and/or VPS' are both on Windows (GUI) and Linux (CLI).
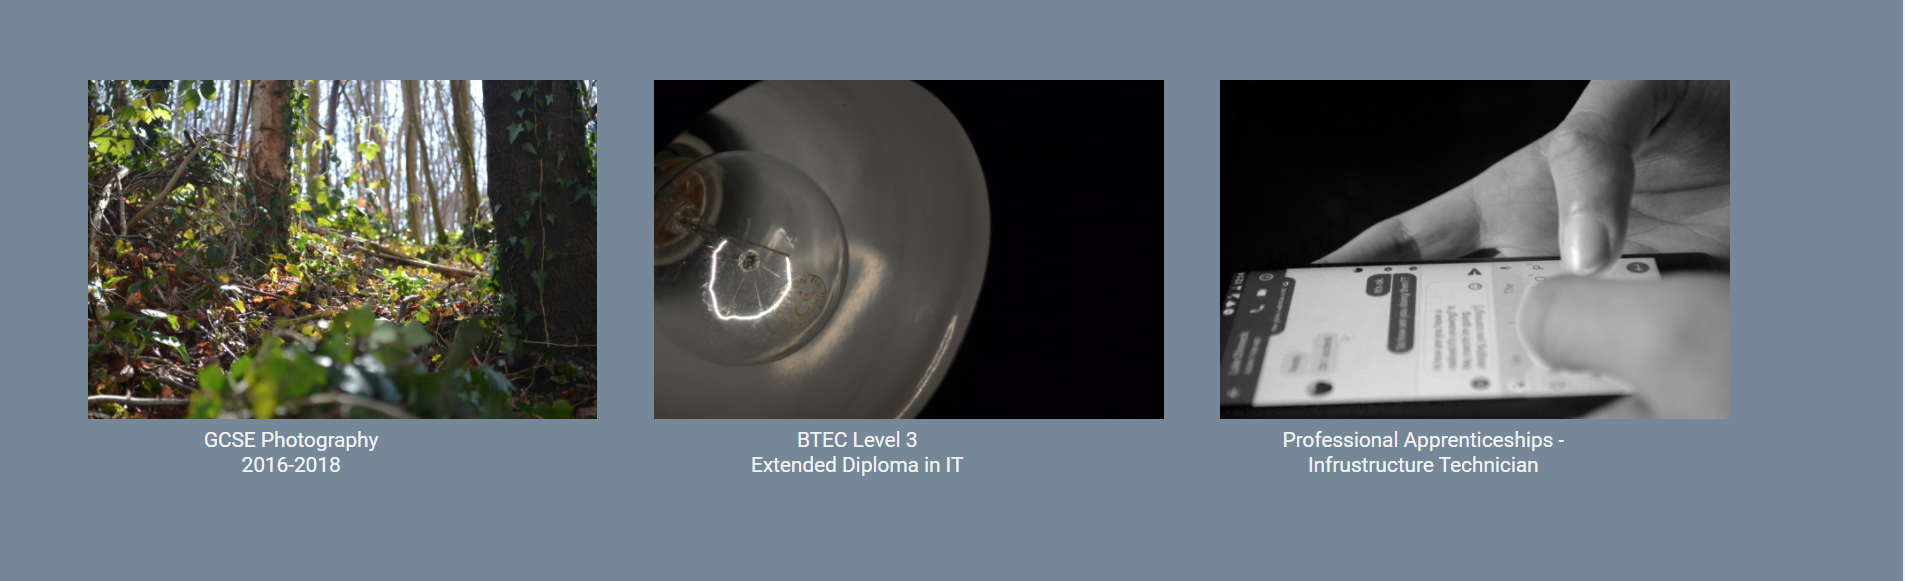
Web development: The Three Links
On the website, I have decided to have links to each element that I would like to showcase. In order to make the links look smart, I decided to use relevant pictures to contain them. The three pictures need to be side by side, in a row.
HTML
<div
class
="pictures" id ="pic">
<a href="photo.html"><img class="main" src ="img/world.jpg" alt ="GCSE Photography 2016-2018"
></a>
<div
class
="text">
GCSE Photography
2016-2018
</div>
</div>
<div
class
="pictures" id ="pic">
<a href="photo.html"><img class="main" src ="img/light.jpg" alt ="BTEC Level 3 Extended Diploma in IT"
></a>
<div
class
="text">
BTEC Level 3
Extended Diploma in IT
</div>
</div>
<div
class
="pictures" id ="pic">
<a href="photo.html"><img class="main" src ="img/world.jpg" alt ="GCSE Photography 2016-2018"
></a>
<div
class
="text">
Professional Apprenticeships
Infrustructure Technician
</div>
</div>
To ensure the pictures stay side by side, at similar distances apart, I used "width: 30%". This means each picture in the row will only reach 30% width, and only 90% of the row will be taken up with photos. The rest of the space is set as padding, which will allow space between each photo. By putting all pictures inside the row class, they will all be placed in the same row.
CSS
.main
{
max-width
: 90%;
max-height
: 30%;
display
: block;
margin
: 0 auto;
padding
: 5em;
margin-bottom
: 2em;
margin-top
: 10em;
}
#undertext
{
font-size
: 0.8em;
}
.pictures
{
float
: left;
width
: 30%;
align-items
: center;
text-align
: center;
}
.text
{
color
: #f2f2f2;
max-height
: 1.3em;
display
: block;
position
: relative;
top
: -5em;
font-family
: Roboto;
}
The website should now hold the three photos as links to their respective pages.
Preview of Main Page
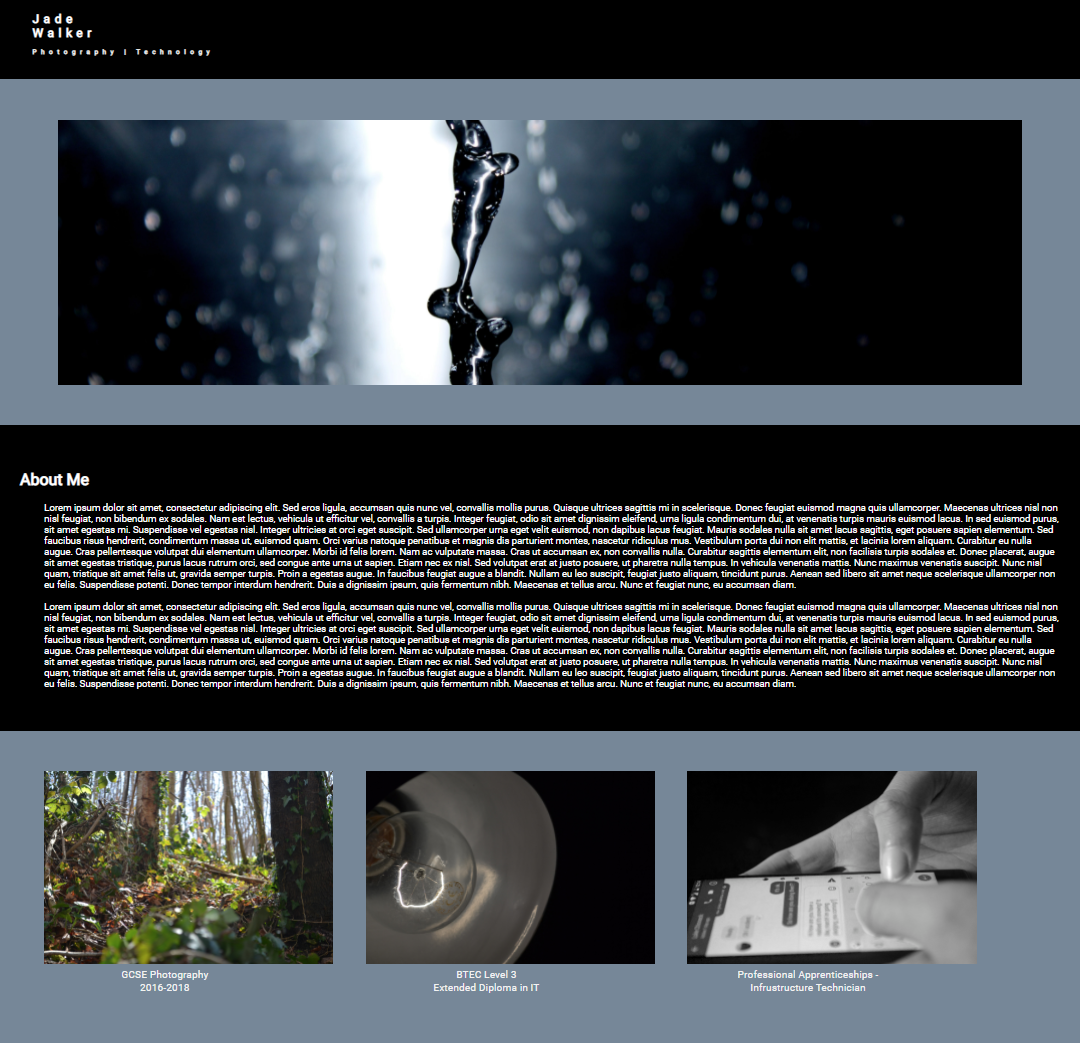
This is a preview of the main page of the website. I'm very happy with the progress I have made so far. The best part of the website is the header, as it's stuck in place, even when the user scrolls down. If I had to improve the website, I would add a picture carousel. It could either have a timer that moves from one photo to another, or two buttons either side in order for the user to change the photo themselves. I would also add a border around the photos, so that the photos are clearer.
The next thing I need to do is create a new page, in order to show how I created this website from start to finish.
Web development: Contents
In order to create another webpage, I need to create another file. I decided to duplicate the 'index.html' file, and remove anything I didn't need. I kept the text I added in "Getting Started", and "The Header", as I want them to be seen on the new webpage. I named the file 'pa.html', short for Professional Apprenticeships.

The next thing I needed to do was to create the contents box. This will allow the user to jump to each header, instead of scrolling through the text. Each title will have a link which will directly jump to the specific header.
HTML
<div
class="black"id="top">
<h3>Contents</h3>
<nav>
<ul>
<li><a href="#setup">Link 1</a></li>
<br>
<li><a href="#setup">Link 2</a></li>
<br>
<li><a href="#setup">Link 3</a></li>
<br>
<li><a href="#setup">Link 4</a></li>
<br>
<li><a href="#setup">Link 5</a></li>
</ul>
</nav>
CSS
h3
{
font-family
: Roboto;
font-size
: 0.7em;
text-align
: center;
}
.black
{
font-family
: Roboto;
font-size
: 2em;
color
: #ffffff;
background
: #000000;
padding
: 2em;
padding-top
: -15em;
margin
: -1em;
}
#top
{
font-family
: Roboto;
font-size
: 2em;
background
: #758799;
padding
: 2em;
padding-top
: 7em;
margin
: -1em;
}
p, li
{
font-family
: Roboto;
font-size
: 0.7em;
margin-left
: 2.5em;
}
ul
{
margin-right
: 3em;
list-style
: none;
text-align
: center;
}
a
{
color
: #ffffff;
}
Cloud Heroes have two server cabinets stored at a local data centre, based on a MOD site. Because of this, any visitors to the site require security clearance and an access request to be approved two days prior. I have been tasked many times to complete jobs at the data centre by the CTO, including hardware replacements and infrastructure upgrades.
The support team were receiving alerts via email over 3 days in regards to a failing hard drive at the data centre. This hard drive belonged to one of our internal backup servers, which backed up our in-house intranet, email service and our file sharing server. After monitoring this over the 3 days, we agreed that the server required attention, and the hard drive needed to be replaced.
I was tasked to complete this, and I sent an access request over to the data centre. I received the confirmation the same day that I was able to complete the work at the location. Two days later, I went to the data centre with a replacement hard drive that had been purchased by the CTO from a supplier on our approved company supplier list. I had been provided a keycard previously, which allows me access to the data centre, along with a 4 digit code and biometrics for security. I only have access rights to the location of our cabinet for 24 hours, in order to protect both us and other users of the data centre.
Once I gained access to our cabinet in the data centre, I had to locate the server. All the servers are labelled either with small stickers or a digital LCD screen, which shows the server's name. The server in question had an LDC screen, which had been flashing red. Usually, the display is blue and only flashes red when there is an issue. With this, I was able to locate the problem drive, as 5 of the 6 drives that were attached had a blue LED next to them, with the faulty drive flashing a red LED. I was able to remove the drive and replace it with the hard drive I had with me. A blue light started to flash, which meant that the drive is trying to rebuild itself, and replicate the failing drive I had removed.
In the Occupational Brief, this covers:
Communication: We do not receive any contact from the data centre, however, we do require contact with them when we request access to the data centre. We send Purchase Orders via email to our authorised suppliers when we purchase a piece of kit. I received training face-to-face with the CTO in regard to the installation of the new hard drive and data centre standards, expectations and processes.
Security: As the server we are trying to maintain is in a secure data centre, we are required to complete their security process along with our own. If there is an issue with access to the data centre, this will need to be escalated to the security staff. If there is an issue with a server at the data centre, this will need to be escalated to the CTO, who will be able to determine whether he is required to be on-site, or if there is a fix available remotely. The data centre has policies that can be accessed as a physical folder around the building, and our policies in regard to data centre access are freely accessible to the technical team via shared storage.
Problem-solving: We must comply with Cloud Heroes guidelines to complete tasks, as the Cloud Heroes guidelines are in accordance with ISO standards. We also need to comply with data centre guidelines and comply strictly with ISO standards. We use an alert tool which alerts the support team when a service or device goes down, with reasons why this would be. To troubleshoot the service or device, we use either Remote Desktop or an SSH tool called SecureCRT, which allows access to a server or device. We can then complete troubleshooting measures via Windows Control Panel or the Linux terminal.
Health and Safety: In completing hardware changes, we need to understand health and safety procedures. We need to complete the correct manual handling when picking up large boxes or items, to protect ourselves from a spinal injury. We also need to comply with HSE's DSA regulations, which are regulations regarding display screen equipment implemented daily. This includes daily screen time, screen brightness and chair positioning.
WEEE: We deal with an electronic disposal company who can correctly complete the disposal procedure on our behalf. Every few months, we order a collection of kit, such as used servers, laptops and small devices, They are recorded internally via their make, model and serial number before being shipped off for record keeping. We have a choice whether or not we receive back recycled kit, or if it is disposed of. This allows us to securely reuse kit in accordance with ISO regulations.
Web Development: Text Dividers
I wanted to separate each element so that the different options could be clearly differentiated, so I decided to add some text dividers. These dividers are going to be different blocks of colour, however, later on I may add some graphics to seperate the two colours. I chose two alternating colours, which are featured on the main page, so there is consistency in the website. The below shows the two different colours (black and grey) set as the class. I had previously set class="black" on a few previous elements, so we can reuse the same code. I do need to define the class on each element, but this means I don't need to add the black class into the CSS file.
HTML (1st colour option)
<div
class="black"
<h3> Setting up a hosting account </h3>
<p> Lorem ipsum dolor sit amet, consectetur adipiscing elit. Sed eros ligula, accumsan quis nunc vel, convallis mollis purus. Quisque ultrices sagittis mi in scelerisque. Donec feugiat euismod magna quis ullamcorper. </p>
</div>
HTML (2nd colour option)
<div
class="grey"
<h3> DNS Propagation </h3>
<p> Lorem ipsum dolor sit amet, consectetur adipiscing elit. Sed eros ligula, accumsan quis nunc vel, convallis mollis purus. Quisque ultrices sagittis mi in scelerisque. Donec feugiat euismod magna quis ullamcorper. </p>
</div>
From this code, it doesn't look like the colour will change. Unless I add some CSS, the colour will not match the website. Here's the CSS I require below:
CSS (1st colour option)
.black
{
font-family
: Roboto;
font-size
: 2em;
colour
: #ffffff;
background
: #000000;
padding
: 2em;
padding-top
: -15em;
margin
: -1em;
}
CSS (2nd colour option)
.grey
{
font-family
: Roboto;
font-size
: 2em;
colour
: #ffffff;
background
: #758799;
padding
: 2em;
padding-top
: -15em;
margin
: -1em;
}
As you can see, I didn't make many changes to the grey class, compared to the black class that I previously used, except for the background colour. This means I can use black and grey alternatively in order to seperate each element and making it easier to read the webpage. Here's the result of the code I added:
Web development: XAMPP
XAMPP is a compact program that developers use in order to set up a local development enviroment for their website. XAMPP runs on a developers computer, and then can be loaded, similar to loading a file or a picture but allows all features to be used and tested. This means they do not need to upload and make live half completed websites in order to see the development of the website and fix any issues. This also means that if any errors occured on the website when live, the developer can take the website and load it in a local envoriment and troubleshoot.
This program has been a great help for me, as I was able to build the website, and load it locally before uploading it to GitHub and the hosting account. When I finished each element, I was able to check the local version to ensure I had made all the changes I required before committing the changes to GitHub, then syncing it all with the hosting account. It's such a great tool that I first used in college, but developed my understanding more whilst building the website.
Web Development: Testing and Auditing
In order to ensure every element I have added to my website is functioning correctly, I decided to complete an audit on all elements featured in this production log. This is so I can fix and amend any elements that affects the users experience when accessing the website. The table I have created lists the element I am testing, the results I am expecting from the tests and the result I get from these tests. I have also added a row in the table so I understand which elements I need to amend and why. If I were to go back and make changes, I will have a clear understanding of what I need to do in order to have a working website, that is user-friendly and readable.
| Element |
Expected Result |
Result |
Review? |
| Main Page - Loading |
Webpage should load in under a second. |
Webpage loads in 0.7 seconds. |
No |
| Main Page - Text Dividers |
Text dividers should be different alterative colours, with gaps between the element and the divider's edge. |
Text dividers are different alterative colours (grey, black, grey), with large gaps between the element and the divider's edge. |
No |
| Main Page - Scroll |
The scroll bar should be visible, can the mouse wheel can also be used to scroll. |
The scroll bar is visible on the right hand side of the page, and can be dragged with the mouse, or can be scrolled with the mouse's wheel. |
No |
| Main Page - The Header |
The header states my name, and the subjects that would be featured on the website's main page. It should span the whole length of the page, but should only cover the top 10% of the page. The header colour should be black, with white text. |
The header colour is black, with white text. The header covers the length of the page, with the correct text, however the header is more than 10% of the page. This means it covers up text which should be visible on the main page. |
Yes - I need to amend the header size. |
| Main Page - The Big Picture |
The main picture needs to match the colour scheme, but stand out. It needs to be aligned to the centre of the webpage and have equal padding on each side. Picture needs to be royalty-free, or owned. |
The main picture matches the black and grey colour scheme, but also stands out as image to introduce users to the website. The picture is aligned to the centre of the webpage and has equal padding on each side. The picture had been taken by myself, so the content is original and no costs were incurred. |
No |
| Main Page - About Me |
Text in the About Me section requires a header which labels the paragraph. The header will need to be bigger than the text in order to stand out. The paragraph will describe myself, similar to a cover letter. |
Text in the About Me section has a header which is suitable for the text below. The header is large enough to stand out from the text. The paragraph describes myself, and introduces the website. |
No |
| Main Page - Picture Options |
Each picture will represent the linked page well, match the colour scheme and stand out from the background. The pictures will be in rows, with 3 pictures in one row, and have equal padding on each side. All pictures needs to be royalty-free, or owned. |
Each picture represents the linked page adequately, matches the colour scheme and stands out from the background. The pictures are in one row, and have equal padding on each side. All pictures had been taken by myself, so the content is original and no costs were incurred. |
No |
| /professionalapprenticeships - Loading |
Webpage should load in under a second. |
Webpage loads in 0.7 seconds. |
No |
| /professionalapprenticeships - Text Dividers |
Text dividers should be different alterative colours, with gaps between the element and the divider's edge. |
Text dividers are different alterative colours (grey, black, etc), with large gaps between the element and the divider's edge. |
No |
| /professionalapprenticeships - Scroll |
The scroll bar should be visible, can the mouse wheel can also be used to scroll. |
The scroll bar is visible on the right hand side of the page, and can be dragged with the mouse, or can be scrolled with the mouse's wheel. |
No |
| /professionalapprenticeships - The Header |
The header states my name, and the subject that would be featured on the website's main page. It should span the whole length of the page, but should only cover the top 10% of the page. The header colour should be black, with white text. |
The header colour is black, with white text. The header covers the length of the page, with the correct text, however the header is more than 10% of the page. This means it covers up text which should be visible on the main page. |
Yes - I need to amend the header size. |
| /professionalapprenticeships - Contents |
Each link in the content should allow you to hover and click, taking you to it's part of the page. The links should take you to the correct part of the page, with the top of the divider being flush with the bottom edge of the header. Each link will need to be tested, and any links that do not work correctly will need to be flagged and amended. |
After testing each link, they all sucessfully allow me to hover and click, and takes me to the correct part of the page. The top of the divider is not flush with the bottom edge of the header, however there is enough space between each piece of text and the header. I do not believe I need to amend the spacing at this time, however if issues do arise due to the placement of these elements, I will review this. |
No |
At Cloud Heroes, we are always keeping our systems up to date. In order to do this, we complete monthly patching on all systems. Although most patches are feature updates, some patches we install are security updates and we are required to install these, as vulnrabilities are patched. Unfortunately, there are times where an OS has reached end-of-life, and requires a new server to be built in order to support the new and improved OS. This had happened with one of our main web servers, which required a migration of data from one server to another. The main server in question holds over one thousand websites, so the migration task required planning and conversation with co-workers to find the best plan of action. I produced a project plan with the agreed way of working, which was provided to co-workers, and the CTO in order for the plan to be approved.
Migration Project Plan
I was given the role as Project Manager for this, with my co-workers completing migration work alongside myself for efficiency. If we ran into any issues in migrating a website, for example it was no longer compatible on the new system and changes were required, we could flag the issue with our website developer for assistance. He would then start an investigation on the website, and find the reason and the resolution for the error.
At the time of writing, we are migrating the second batch of websites. We have migrated over 300 websites in the space of a year, and are hoping to complete the rest over the next year, as the main system that previously held the website is no longer suitable for the amount of users using and accessing the system on a daily basis. Our next step after this would migrate email services from this same system to a newer system.
In the Occupational Brief, this covers:
Communication: To plan the migration, we communicate internally via email or in person. Any discussions in person will be noted for future reference. If communication is required with a customer regarding the migration, this is completed via email, with a follow-up email and phone call the following week.
Security: Cloud Heroes have a secure process of migrating data, and data is retained on the previous server for 30 days before it is securely removed. This process meets ISO standards. The retention of data is for both the company and the customer's peace of mind, as the old server still retains a working version of the website. We also change the passwords for the database when migrating, so that it does not match the details on the old server.
Problem-solving: We must be compliant with Cloud Heroes guidelines to complete tasks, as the Cloud Heroes guidelines are following ISO standards. If any issues with the migration appear, we do our best to complete any fixes such as an error during migration which is flagged by our migration tool (Migration Tool by Plesk) and issues with the DNS not propagating to the correct server using MXToolbox. If there is an issue with the database, it is escalated to my colleague, who will use a tool called DbSchema, which will check for any errors in the database which would cause issues to the website. My colleague has shown me how to use this software, and I have completed a database fix for one of the websites we migrated.
Workflow Management: We do not complete migrations often, however, when they are completed, one person is required. If it requires a second opinion, details are emailed to the suitable person and checked over before any drastic changes are made. If contact is made with a customer, this is ticketed for record keeping and an easier handover to colleagues.
Performance: Migration is completed from one server to another. Both use a GUI and are shared systems. To migrate data from one server to another, we require the Plesk Migration tool which is an installable add-on to the main Plesk environment. This tool is accessible via an admin account on the server, and customers are unable to use the tool unless they have requested the tool for their Hosting Account.
Web development: SSL Installation
An SSL (Secure Sockets Layer) is a protocol which allows secure connection to a service, in this case it's for a website. An SSL is the main reason why links can load as "HTTPS" instead of "HTTP", where the S standands for secure. When installing the SSL to this website, I required to create a certificate which confirms the identity of the website to allow a secure connection. This was possible through the Plesk panel. The SSL is provided LetsEncrypt; a non-profit focused on providing free SSLs for websites in order to allow secure access to services for everyone.
These SSLs are temporary and lasts around 3 months. You are able to purchase SSLs that last 1 year from the date of install from reputable sources.
IMAP/POP3 Mailbox Creation and Setup
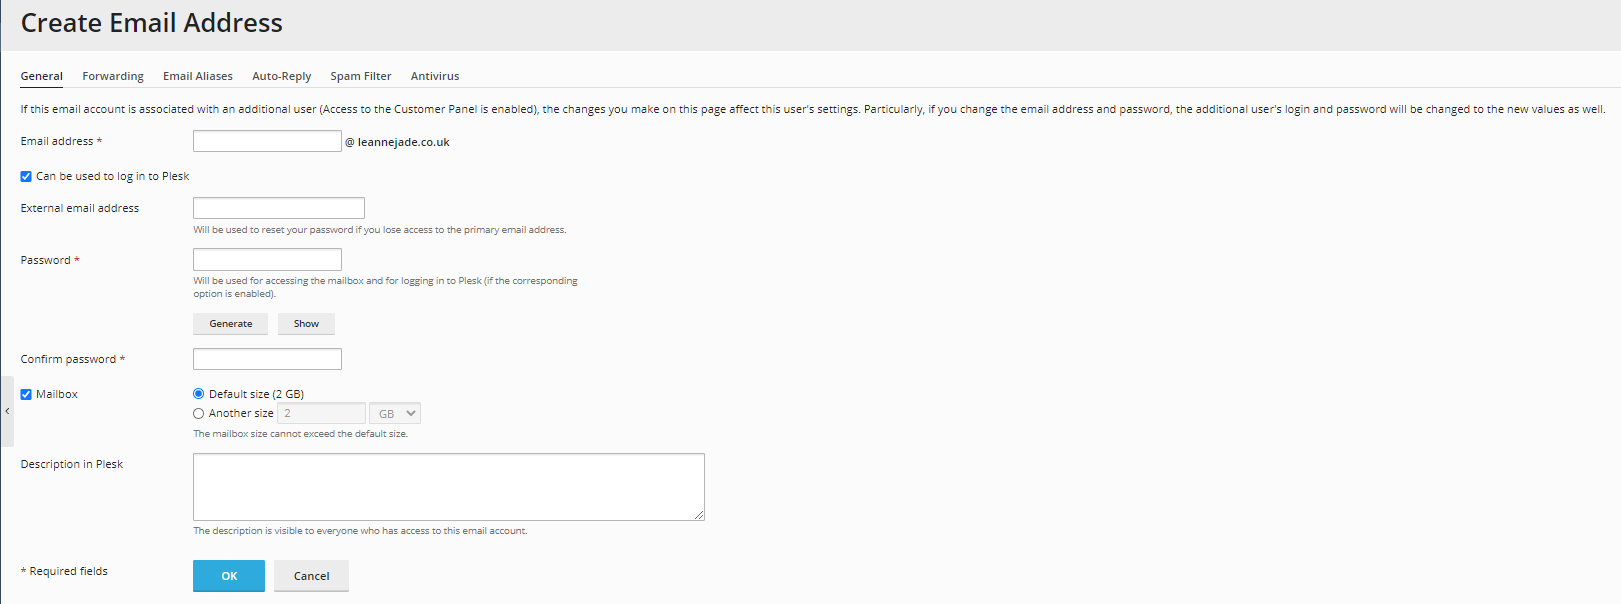
Most hosting companies add mailboxes as a free add-on to hosting accounts, so I have decided to set my own mailbox under my domain. This will mean anyone who emails me will be presented with a smart-looking email address, associated with my website. As well as hosting websites, Plesk can also host mailboxes. This is where I'm creating my new email address.

I went to the Create Email Address page and chose an email address to use. I decided this account I create should have access to the Plesk panel to manage the website, so I enabled that access. I set an external email address, to have a safety net if I forget my password. The password needs to meet minimum requirements (a minimum of 8 characters: 1 uppercase, 1 lowercase, 1 number and 1 special character) and can be generated by the server if a secure password cannot be created manually. You can change the default size of the mailbox, as long as it's below the default size set. I decided to set the default size as 2GB, and I continued with the creation of the account.
I wanted to set up a forward, so if I am unable to check this mailbox, I will still receive emails. I entered my personal address for this. Any emails forwarded on will still be retained in this mailbox for record-keeping purposes.

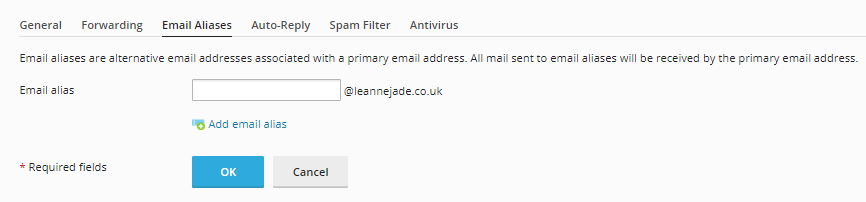
I can also set up email aliases in this portal. An email alias allows me to attach another email address to the account, and all emails are still received by me. This is used so that I can receive emails that go to non-existent generic mailboxes, such as "accounts" or "sales". I do not require this at the moment, but I can amend this again in the future.
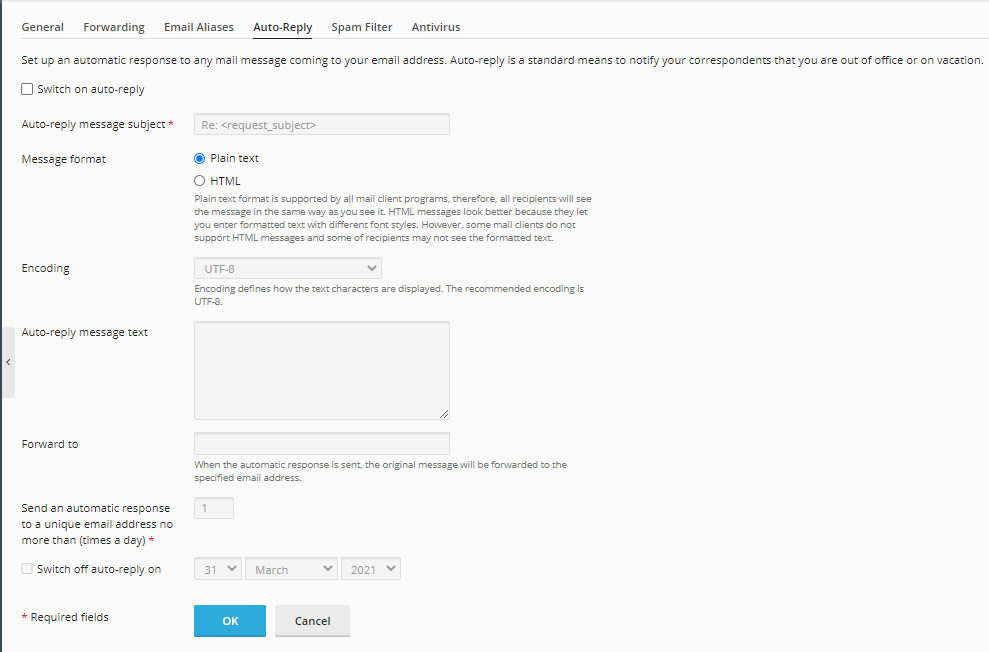
There's an ability to set an auto-reply in Plesk for each mailbox, which is a great feature for out-of-office replies, or auto-replies to send automatic replies about waiting times or key information. This may be something I may use in the future, but I do not require it at this moment in time.
I have now created my mailbox, and I can start to set this up on my preferred device.

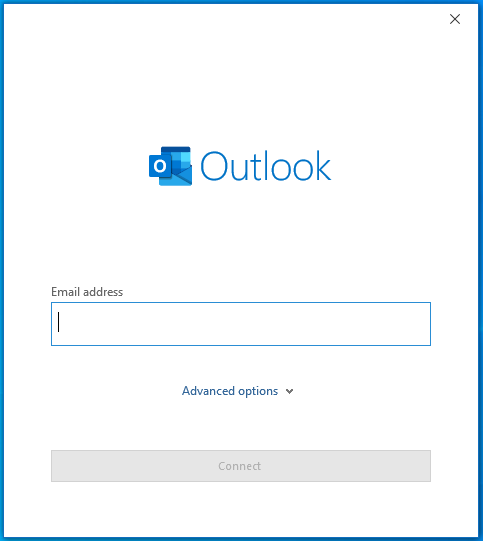
When I first opened the Outlook app, I am given a screen asking for the email address. I will enter the new email address I had created.
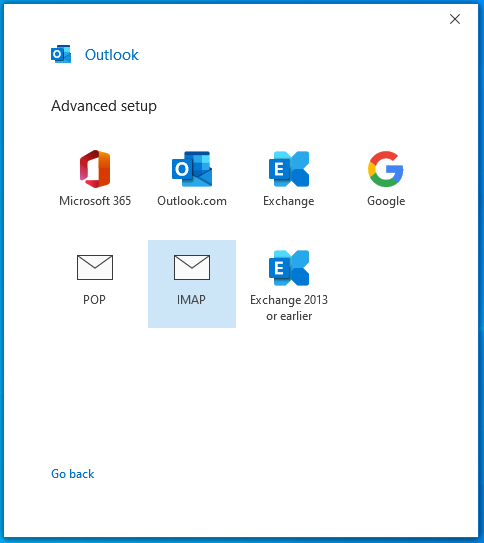
The next page is asking me to choose the account type. Depending on where the account was set up, and if it had been set up with a specific provider, there are different settings. For accounts that can be automatically set up, like Microsoft 365 and Google, it is as easy as entering an email address and password.
It's more complicated with a POP or IMAP account, as they need specific settings entered. If they are not entered correctly, this can cause errors with the account. There is a difference between the POP and IMAP protocol: POP store your emails on the device you are viewing from and removes them from the server, however, IMAP keeps the emails on the server and can be viewed on multiple devices. I have decided to set the account up with the IMAP protocol.
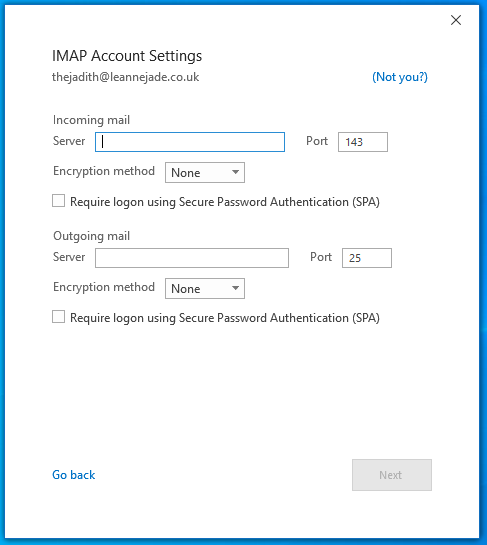
The Account Settings required are different depending on the service provider, and they will be able to provide the correct details.
The Incoming Mail Server checks for incoming mail on the server and will not work if the server name is incorrect. The port number specifies which open port should be used to connect to the server. Usually, the port for incoming mail is 143 for the unencrypted route, and 993 for the encrypted route.
The Outgoing Mail Server pushes outgoing mail out from the device to the server and will not work if the server name is incorrect. Usually, the port for outgoing mail is 25 for the unencrypted route, and 587 for the encrypted route.
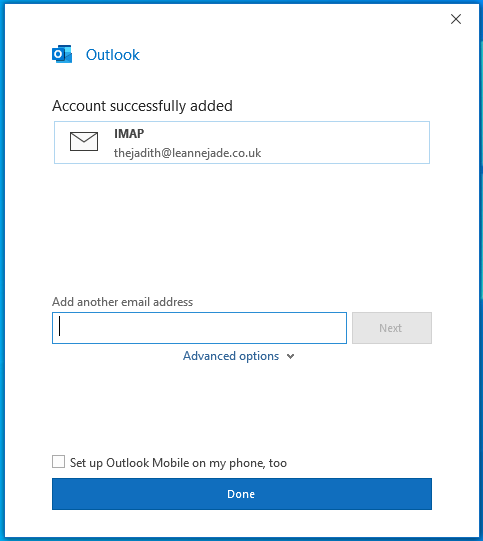
Now the account is set up on my device via the IMAP protocol, I can access my emails.
Review
I have thoroughly enjoyed making this portfolio, and showing the skills I have learned via building a website. Over the past few years, I have been able to complete tasks that have provided me with the knowledge I used to build the website, alongside study which I have completed outside of the workplace. There are many skills that I could improve on to add more elements to the website, which is my plan for the future. My testing and auditing of the website has shown that there are some elements that are not working correctly, which can be amended after future research. In the future, I would like to further my studies in website development to improve this portfolio and learn more about back-end coding. This will allow me to learn new skills that could assist in a future upgrade to the website.
Cloud Heroes Review
David Shears - Helpdesk Co-ordinator:
Jade has grown significantly in her role at Cloud Heroes since joining us in early 2021. She has developed a polite and professional manner when communicating with customers on the phone and electronically. Jade is able to deal with most first-line requests independently and is capable of covering the helpdesk single-handedly when required. She has had the opportunity to visit customer sites and we receive positive feedback following her interactions with clients. Jade is quick to volunteer for work that is appropriate to her role and has a willingness to learn and contribute to shaping internal work practices.
Michelle Walker - Operations Manager:
Since joining Cloud Heroes in early 2021, Jade has become a highly valued member of the team. Her confidence has grown significantly, and she has developed a gracious and professional manner when communicating with customers.
Jade is very quick to volunteer for tasks/projects and has demonstrated her ability to be organised and diligent when managing workloads. She is able to resolve the majority of first-line support requests independently and has recently completed a couple of customer site visits which has resulted in very positive feedback.
My thoughts:
Over the past few years at Cloud Heroes, I have had the privilege of learning particular skills which may not be possible in other businesses. I can take a hands-on approach to most situations and find out how to resolve a real-life query, in a fast-paced environment. I hope to continue assisting users and my colleagues, using the knowledge that I have learned. I would also like to learn new tasks, which could allow me to be more independent in the workplace. I would like to be involved in larger projects, with the ability to learn how to effectively manage a team.